Basement Waterproofing Solutions That Work for Persistent Dampness

Persistent basement dampness rarely stays a basement problem for long. It creeps upward into flooring, trim, and indoor air quality. It stains stored belongings, feeds mold, rusts tools, and leaves a house with that unmistakable cool, earthy smell that buyers notice within seconds. Homeowners often try the obvious fixes first, a dehumidifier in the corner, a coat of waterproof paint, maybe a fan running for a few days after rain. Those measures can help with symptoms, but they do not solve the conditions that keep the space wet.
Effective Basement Waterproofing starts with understanding why moisture is getting in and why it lingers. In my experience, the biggest mistake is treating all damp basements as if they fail for the same reason. Some are taking in bulk water through cracks or wall joints. Others are mostly dealing with humid air, condensation, or poor grading outside. In older homes, you may see two or three moisture pathways at once. That is why a lasting fix depends less on a miracle product and more on a diagnosis that matches the building.
What persistent dampness is really telling you
A basement can look only mildly affected and still have a serious moisture problem. Paint bubbles. Cardboard boxes soften at the bottom. White chalky residue appears on concrete or masonry. That residue, called efflorescence, is a clue that water is moving through the wall or slab and leaving mineral deposits behind as it evaporates. If the air feels cool and clammy even when there is no standing water, the issue may be elevated humidity and condensation rather than direct leakage.
The timing matters. If the space gets wet only during prolonged rain, exterior water management is usually part of the story. If dampness shows up during humid summer weather, cold foundation surfaces may be condensing moisture from the air. If one corner is always musty, a hidden crack, a failed window well, or a plumbing leak may be involved. Basements are below grade, so they live in constant contact with moist soil. Water pressure builds around foundation walls after storms, and where there is pressure, water looks for any weakness.
Concrete is not a waterproof material by itself. It is durable and dense, but it can absorb and transmit moisture. Masonry block walls are even more vulnerable because their hollow cores can collect water. That surprises many homeowners. The wall may look solid from inside, but moisture can travel through joints, pores, and openings you would never notice without close inspection.
The difference between water control and water resistance
One useful way to think about Basement Waterproofing is to separate water control from water resistance. Water control keeps water from building up around the foundation and directs it safely away. Water resistance helps surfaces tolerate some moisture without damage. The first category includes grading, gutters, downspouts, drains, sump systems, and exterior membranes. The second includes vapor barriers, sealants, insulation choices, and interior coatings.
This distinction matters because interior waterproof paint is often sold as if it can do the job of drainage. It cannot. A coating may slow vapor transmission and improve appearance, but if hydrostatic pressure is forcing water through the wall joint or slab, paint is not the answer. In fact, I have seen coatings peel off in broad sheets because pressure from behind the wall was stronger than the bond at the surface. When people say they “waterproofed” the basement and it still leaks, this mismatch is often the reason.
Start outside before you tear up the inside
Some of the most successful fixes are also the least glamorous. Before investing in an interior drainage system or wall liners, inspect the exterior. It is remarkable how often a damp basement improves once roof runoff and surface water are controlled properly.
Walk the perimeter during or just after a rain if you can do so safely. Look for low spots near the foundation, downspouts that dump water a foot from the wall, mulch piled above the siding line, or hard surfaces pitched toward the house. In older neighborhoods, settled walkways and stoops commonly send water back against the structure. The basement pays for that mistake every time it rains.
These exterior corrections routinely make a measurable difference:
- Extend downspouts well away from the foundation, often 6 to 10 feet if the site allows.
- Restore positive grading so soil slopes away from the house, ideally over the first several feet.
- Repair or replace leaking gutters, especially at corners and end caps.
- Rebuild or improve window wells with proper drainage and clear covers where appropriate.
- Seal obvious exterior penetrations around pipes, conduits, and masonry openings.
None of those steps is exotic, but they work because they reduce the amount of water reaching the foundation in the first place. That lowers the burden on every other waterproofing measure. On houses with modest dampness, this alone can shift the basement from chronically clammy to manageable.
When interior drainage is the right answer
There are homes where exterior fixes are necessary but not sufficient. If groundwater regularly rises around the footing, or if the house sits on a lot with naturally poor drainage, water may still find its way in no matter how carefully you direct runoff. That is where an interior drainage system earns its keep.
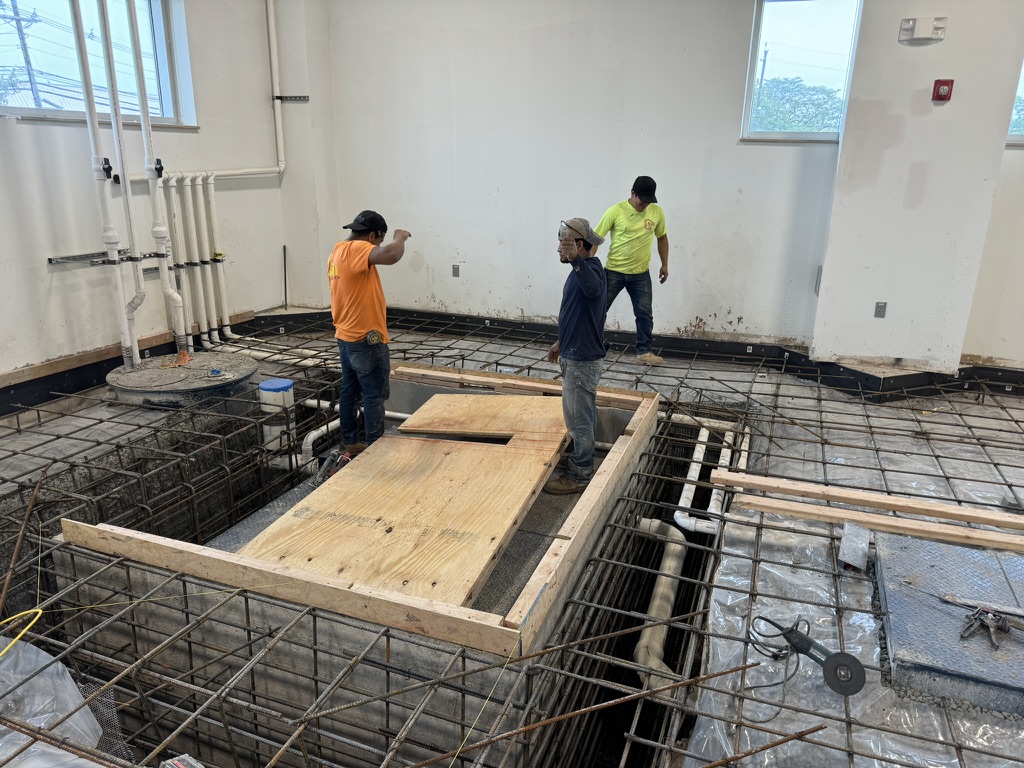
A typical interior system involves breaking out a narrow strip of concrete around the inside perimeter, placing a drain channel or perforated pipe beside the footing, covering it with clean stone, and connecting it to a sump basin. Water that enters at the wall-floor joint or from beneath the slab is intercepted and pumped outside before it can https://trentonwypi995.birchreport.com/posts/simple-ways-to-support-basement-waterproofing-from-the-outside spread across the floor. On masonry walls, installers often drill weep holes at the base of the block to relieve trapped water inside the wall cores.
This is one of the more reliable solutions for chronic seepage because it accepts a truth about many basements: some water is going to arrive, and the smartest move is to collect and remove it predictably. Homeowners sometimes resist the idea because it feels backward to manage water after it enters the building envelope. Yet in many existing homes, especially where exterior excavation is difficult, an interior perimeter drain is the most practical, durable option.
The quality of installation matters. A sump pit should be sized appropriately, the pump should have enough capacity for the expected inflow, and the discharge line must send water far enough from the house that it does not recycle back to the foundation. In colder climates, the discharge line needs freeze protection or routing that reduces the chance of winter blockage. I strongly favor a battery backup or water-powered backup pump in any basement where finished space, mechanical equipment, or valuable storage is at risk. A storm that knocks out power is often the same storm that fills the pit.
Exterior waterproofing for serious foundation exposure
When a basement wall shows active infiltration through cracks, porous masonry, or failed dampproofing, exterior waterproofing is often the most complete remedy. This is the approach that addresses the foundation wall from the soil side, where the water originates. It usually involves excavation down to the footing, cleaning and repairing the wall, applying a true waterproof membrane, installing drainage board, and improving footing drainage before backfilling.
This is not a small job. It can be expensive, disruptive to landscaping, and difficult where decks, porches, driveways, or property lines limit access. But when done well, it can transform a chronically wet basement. Exterior work is especially compelling in houses with finished basements, severe wall leakage, or foundation materials that are deteriorating under repeated wetting.
People sometimes ask whether exterior waterproofing is “better” than interior systems. The honest answer is that it depends on the failure mode. Exterior work prevents water from contacting the wall in the same way, so in that sense it is more comprehensive. But interior drainage may still be preferable where excavation is impractical or where water pressure under the slab is the main issue. Good contractors should be able to explain why a method fits your house rather than claiming one method is universally superior.
Crack repair, and why not every crack deserves panic
Foundation cracks attract understandable attention, but they vary enormously in significance. Hairline shrinkage cracks in poured concrete are common. Wider cracks, stair-step cracks in masonry, or cracks with lateral displacement deserve closer scrutiny. If water is entering through a crack, epoxy or polyurethane injection may provide an effective targeted repair. The material choice depends on whether the crack needs structural bonding, flexible sealing, or both.
Polyurethane injections are often used where active water infiltration is present because the foam can expand into damp pathways and stop leaks. Epoxy is stronger and commonly used when structural restoration is part of the objective, but it is less forgiving if the crack continues to move. In practice, a leak repair should always be paired with moisture management outside. Sealing a crack without addressing the water load that exploited it can turn one leak into another somewhere nearby.
If the crack is growing, if walls are bowing, or if doors and windows above are shifting, that moves the issue beyond basic waterproofing and into structural assessment. Persistent dampness is one problem. Foundation movement is another, and it deserves its own diagnosis.
Humidity and condensation, the sneaky half of basement moisture
Not all dampness starts with rainwater pushing through the wall. Summer condensation is one of the most misunderstood basement problems. Warm outdoor air carries moisture. When that air enters a cooler basement and hits concrete, ductwork, or uninsulated pipes, water condenses out of the air. The floor feels damp, metal sweats, and people assume they have a leak.
This is where dehumidification, air sealing, and insulation strategy matter. A dehumidifier can be highly effective when sized correctly and drained continuously to a sump or condensate line. Portable units work for small spaces, but larger basements often benefit from a purpose-built basement dehumidifier that can maintain relative humidity below about 50 to 55 percent with less fuss.
Insulating cold water pipes prevents dripping. Sealing rim joists reduces humid air infiltration. If the basement is being finished, closed-cell spray foam or rigid foam against foundation walls usually performs far better than fiberglass batts tucked into a stud cavity against cool concrete. Fiberglass can trap moisture, encourage mold growth, and leave the wall assembly cold and vulnerable. I have opened enough finished basement walls to say this confidently: the wrong insulation detail can hide a moisture problem for years while the framing quietly decays behind drywall.
Why interior wall coatings have a limited but real role
Waterproof paints and masonry sealers are not fraudulent products, but they are often overpromised. Used in the right setting, they can reduce minor vapor transmission, brighten a basement, and make the space feel cleaner. Used as the sole remedy for active seepage, they disappoint.
I think of these products as finishing layers, not primary defenses. If the exterior drainage is corrected, leaks are repaired, and humidity is controlled, a quality masonry coating can be a reasonable finishing step. It may also help where a wall has slight seasonal dampness but no significant water entry. The key is realism. Coatings resist, they do not relieve hydrostatic pressure.
Surface preparation also matters more than the label suggests. A dusty, salt-laden wall is a poor substrate. If efflorescence is not cleaned off and underlying moisture remains high, even a premium coating can fail early.
The basement floor is often part of the problem
Walls get most of the attention, but slabs deserve a closer look. Moisture can rise through the basement floor even when walls seem dry. You may notice darkening under rubber-backed mats, warped laminate, or adhesive failure under vinyl tiles. A simple taped plastic test can hint at whether the slab is transmitting moisture, though it is not a substitute for proper measurement when flooring decisions are on the line.
If you are planning to finish the basement, flooring choice matters. Directly installing sensitive materials over a damp slab is asking for trouble. Dimpled underlayment systems, subfloor panels designed for basements, or moisture-tolerant finishes such as tile or certain engineered products perform better than carpet pad over concrete. The point is not only comfort. It is giving the floor assembly a way to handle modest moisture without becoming a mold incubator.
Signs that point to the right solution
Choosing between exterior grading work, crack repair, dehumidification, and drainage systems gets easier when you match the symptoms to the likely cause. A few patterns show up again and again on real job sites:
- Dampness concentrated at the wall-floor joint after rain often points to footing or perimeter drainage issues.
- Uniform musty air with no visible seepage often points to humidity and condensation.
- Isolated staining below a window or pipe penetration suggests a local entry point rather than a whole-foundation problem.
- Peeling paint with white mineral residue usually means moisture is moving through masonry, not just surface humidity.
- Water appearing near the center of the floor can indicate slab moisture or a plumbing issue, not only wall leakage.
These patterns are not perfect, but they help narrow the field. Good Basement Waterproofing is as much about pattern recognition as it is about products.
The reality of older homes
Older basements play by different rules. A hundred-year-old stone or brick foundation may never behave like a newly poured, fully membrane-wrapped foundation. Trying to force modern expectations onto historic materials can backfire. I have seen old fieldstone walls trapped behind impermeable interior finishes, only to worsen freeze-thaw damage and mortar deterioration because the wall could no longer dry properly.
In those cases, the better approach may be more nuanced. Improve exterior drainage. Repoint failing mortar with compatible materials. Manage interior humidity. Accept that the basement may become clean, dry enough, and stable rather than showroom dry. That phrase, dry enough, matters. A utility basement used for storage and mechanicals does not require the same performance target as a fully finished living area with wood trim and upholstered furniture.
What a smart repair plan looks like
The best projects are sequenced, not rushed. Start with diagnosis. Rule out plumbing leaks and HVAC condensate issues before assuming the foundation is at fault. Improve roof drainage and grading next because those measures are relatively affordable and often solve more than expected. After that, move to targeted repairs such as crack injection, window well correction, or sump upgrades. Reserve major excavation or interior perimeter drainage for cases where the evidence supports it.
Contractor recommendations are worth comparing carefully. One company may push interior systems because that is what they install. Another may insist on excavation because that is their specialty. Ask each one to identify the moisture path they believe is active, how they confirmed it, and what would happen if their proposed fix were not done. The answer should sound specific to your house, not like a script.
Pricing varies widely by region and scope, so broad national numbers are not very useful without context. A downspout and grading correction might cost a small fraction of a full drainage system. A sump pump replacement is one tier of expense, while exterior excavation around a finished landscape is another altogether. The cheapest bid is often cheap because it solves only the visible symptom.
Finishing a basement before it is truly dry is expensive optimism
I understand the temptation. Once the water seems under control for a few months, the space starts to look like untapped square footage. But finishing too soon is one of the costliest mistakes homeowners make. Moisture problems often reveal themselves seasonally. A basement that seems acceptable through a dry autumn may fail in spring thaw or during summer humidity spikes.
Before framing, flooring, or drywall goes in, monitor the space through weather changes if possible. Use a hygrometer. Watch the sump during storms. Check corners, wall bases, and slab edges. If you are going to invest in finishes, make them moisture-tolerant by design. Keep wood and paper-faced materials off concrete. Leave service access for pumps and cleanouts. Think through what happens if water returns. Basements reward cautious planning far more than optimism.
Maintenance is part of waterproofing, not an afterthought
Even excellent Basement Waterproofing systems need periodic attention. Gutters clog. Downspout extensions get kicked loose. Sump pumps wear out. Discharge lines freeze, especially when winter brings a sudden deep cold snap after a wet period. A basement that stayed dry for five years can still surprise you if maintenance slips.
Homeowners do not need a complicated routine, but they do need a regular one. Check the pump before storm season. Pour water into the pit and make sure it cycles properly. Inspect the discharge outside. Clear debris from window wells. Walk the grading line each spring and look for settlement. Pay attention to odors because a musty smell often shows up before visible water damage does.
Persistent dampness is frustrating partly because it encourages shortcut thinking. A product promises to block moisture. A contractor promises a lifetime fix. A dehumidifier promises comfort. Each can play a role, but durable results come from matching the remedy to the building and the moisture source. Once that happens, basements become far more predictable spaces. Not magically dry by luck, but dry because water was redirected, pressure was relieved, humidity was controlled, and the weak points were treated with the respect below-grade construction demands.
ARD Waterproofing
98 Smull Ave, West Caldwell, NJ 07006, United States
+1 917-691-8411
FAQ About Basement Waterproofing
Can you 100% Waterproof a Basement in West Caldwell?
A properly designed system can substantially reduce basement water intrusion, but no method can promise protection against every flood, equipment failure, or future change in site conditions. The first step is identifying whether moisture comes from surface runoff, groundwater, plumbing, or condensation. Solutions may include grading and gutter improvements, drainage, foundation repairs, and a sump system. Review the specific coverage and exclusions of any written warranty.
How much does it cost to professionally waterproof a basement in NJ?
There is no single price that fits every basement. Cost depends on the cause of the leak, the area needing work, access, excavation requirements, drainage design, sump equipment, and restoration of disturbed finishes or landscaping. Request an on-site assessment and an itemized written estimate that explains the scope, exclusions, and maintenance requirements before comparing proposals.
How long does foundation waterproofing last in West Caldwell, NJ?
Service life varies with the waterproofing materials, installation quality, soil and water conditions, and maintenance. Drainage components and pumps may require servicing or replacement even when other parts of the system remain functional. Keep gutters, drainage outlets, and sump equipment maintained, and have recurring leaks or changes in foundation condition assessed. Ask for product-specific expectations and written warranty terms rather than relying on one lifespan for the entire system.